The single thing I’ve implemented since the previous post is palette rendering, also known as indexed color rendering. If you’ve been using computers for longer than ~15 years or played games on an old-skool 8-bit console such as the NES, you probably have some idea what indexed color is about. For everyone else, grandpa will quickly explain ;-). Long ago, before we had smartphones, VR headsets and 4K screens, computers were pretty bad at displaying graphics. At first, they could not even display anything but monochrome images, using some hideously low resolution like 320x200 pixels. Or even less, if you go back far enough. As time progressed and computers got more widespread use, for example for games, they got better graphics capabilities. As you may have guessed, computers didn’t go from monochrome images straight to the (practically speaking) unlimited 32 bits-per-pixel color fidelity any run-off-the-mill computer or smartphone supports today. At first, most computers could only display a handful of colors, and often even just a subset of them at once. For example one of the first PC graphics cards, IBM’s Color Graphics Adapter (CGA) only supported 16 colors, of which only 4 at once could be displayed at the same time. Similarly, the Nintendo NES was capable of displaying 64 colors, but only in arrangements of 4 per sprite or background tile.
This is where palettes come into play. Internally, these old computers stored pixel values using bit planes or packed pixels, where one byte of video or sprite memory encoded for several pixels, to conserve memory. For 4-color CGA modes 2 bits per pixel where stored, or 4 pixels per byte. It would be a little too involved to exactly describe how NES graphics work and how you could coax it to get many colors on the same screen at once, but fundamentally it also uses 2 bits per pixel for sprites and background tiles. So how do we get from 2-bits per pixel, to one of the 16 (CGA) or 64 (NES) colors supported by the video hardware? Palettes!
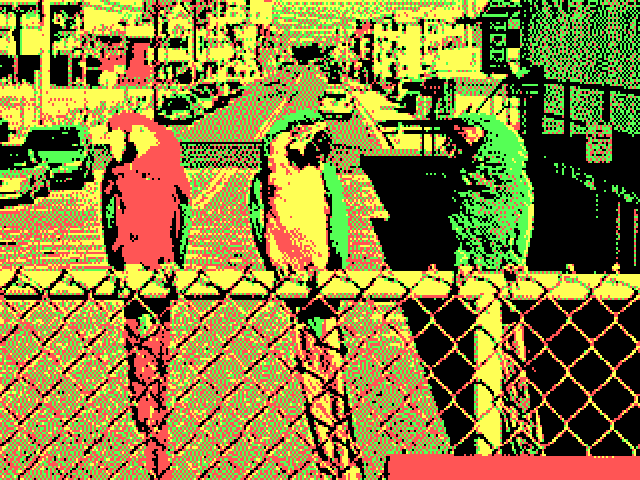
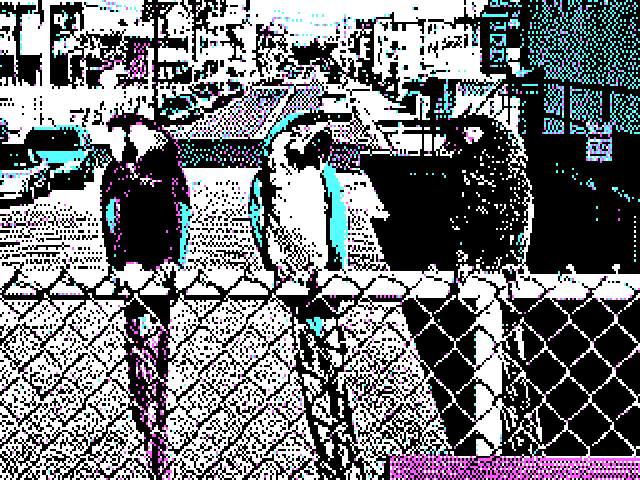
Palettes are basically just color lookup tables, mapping color codes (numbers) to colors (RGB values). Nowadays almost any computer you will come across can simply make any color directly by specifying the red, green and blue (RGB) components for each pixel, but older computers actually contained video hardware that would lookup colors by using the color codes of pixels in video or sprite memory. CGA, for example, had 2 hard-coded palettes of 4 colors, the first palette having black, red, yellow and green, and the second palette a hideous combination of black, white, cyan and magenta. Using an intensity bit and some voodoo magic, it was possible to get more colors and change the palettes a bit, but 2 palettes of 4 colors was what you’d normally be working with. The following two images from the Wikipedia page about CGA shows the same image in the two standard CGA palettes:


Palettes and 2k14: The Game
One might wonder why all this is relevant in the context of 2k14: The Game, since we’re targeting iOS device, which all support 32-bit RGBA framebuffers. There’s two reasons:
-
To be able to colorize sprites depending on the theme of the planet they are on
All of the game sprites are created as bitmap textures which means their colors are hard-coded at compile time. Depending on the theme and color of the planet they are used on, we may want to have different coloring of the same entity though. For example a red/yellow turret would be a little out of place on a green plane. We could store different versions of the same texture for each entity, each colored differently, but this would be wasteful and bothersome. It would be much nicer if we could store each sprite frame once, and re-color it at runtime.
-
As an easy way to add some ‘cheap’ visual effects
Classic games that had to use indexed colors by necessity employed all kinds of nifty palette tricks to achieve various visual effects, for example palette rotation and swapping. 2k14: The Game is in a sense also an old-fashioned game with a retro-style, so we would like to use the same kinds of tricks. Palette swaps can for example be used to flash a sprite when it is hit, to pulsate its color, etc.
Implementation
Quite a bit a of text just to introduce the concept of palette rendering. By now, writing all this up already took me longer than to actually implement palette rendering into the game ;-). Fortunately a description of the implementation itself can be pretty concise.
As mentioned before, modern computers, including any smartphone sold less than about 10 years ago, support direct 32-bit RGBA colors. Palettes are still relevant in the context of indexed-color image formats, but there typically is no hardware support for indexed color render whatsoever. Fortunately, we now have something much better, which is programmable GPU shaders, which allow us to very easily emulate palette rendering.
For 2k14: The Game I wrote a very simple fragment shader that performs per-fragment color swapping of the sprite texture. The shader works by mapping the color channels of the sprite texture to a three-bit number, where each bit corresponds to a color channel (red, green, blue) of the sprite texture. This gives us 8 color codes, which are used to lookup colors in an 8-pixel wide texture, the palette texture, the columns of which encode the RGB values corresponding with each of the 8 color codes. Multiple palettes can be encoded into the same texture, one for each row, which can subsequently be indexed using a palette index which is transformed to a row in the palette texture. For the time being, the size of the palette texture is required to be 8x8 pixels, giving us 8 palettes of 8 colors each.
The following image illustrates an example palette texture containing three palettes, alongside a sprite of the game as it is stored on disk before coloring. The bright green color corresponds with the 3-bit color code 010 binary (2 decimal), the purple color with color code 011 binary (5 decimal). At runtime, they will be replaced by green and yellow if the first palette row is active, purple/brown if the second palette is active, or yellow/green if the third palette is active:
The fragment shader itself is pretty straightforward, it just samples
the sprite texels, calculates the color code by quantizing the texel
RGB values to 1 bit, looks up the color in the palette texture and
then scales it by the texel luminosity and alpha to get antialiasing
and to allow shades of each palette color. The palette index itself
is passed to the shader as a uniform value that is simply divided by
the palette texture height to get the row that encodes the palette.
One final remark is that the shader requires the texture filtering
for the palette texture to be set to GL_NEAREST, ie: nearest-neighbor
lookup. This ensures the GPU will not try to interpolate the pixel
values in the palette texture but will just do a direct lookup. The
shader code looks like this:
varying lowp vec2 v_texcoords;

uniform lowp vec4 u_tint;
uniform sampler2D u_texture0;
uniform sampler2D u_palette;
uniform int u_palette_index;

void main()
{
  // Get sprite texel
  lowp vec4 texel = texture2D(u_texture0, v_texcoords);

  // Quantize text to get non-zero RGB channels
  bvec3 binary_texel = bvec3(texel.r, texel.g, texel.b);

  // Calculate luminance as average intensity of the non-zero texels
  lowp float luminance = (texel.r + texel.g + texel.b) / (float(binary_texel.r) + float(binary_texel.g) + float(binary_texel.b));

  // Combine binary texels into a 3-bit number to get a color code between 0 and 8
  int color_index = int(binary_texel.r)*4 + int(binary_texel.g)*2 + int(binary_texel.b);

  // Assuming an 8x8 palette texture, the palette texture coordinates can be calculated by
  // multiplying the color code and palette index by 1/8
  lowp vec2 palette_coords = vec2(0.125 * float(color_index), 0.125 * float(u_palette_index));

  // Lookup palette color and scale by luminance and alpha. NOTE: this assumes nearest-neighbor
  // filtering of the palette texture
  lowp vec4 palette_color = texture2D(u_palette, palette_coords);
  lowp vec4 frag_color = palette_color * texel.a * luminance;

  gl_FragColor = frag_color;
}
The way I’ve implemented the palette lookup in the shader is probably pretty inefficient, and the way the alpha value and luminosity are used to shade the fragment may not be entirely correct, but for now the result looks good enough ;-)
Loose ends
To tie everything together I created an extremely simple palette
class K14Palette that can be used to set palette colors using
a row (palette) and column (color) index, and to generate the
palette bitmap. The K14Planet class now has a read-write palette
property that can be used to set the palette used for entity
rendering
Because the palette bitmap needs to be re-submitted to the renderer
whenever the palette changes, I needed a way to notify the view
controller whenever the K14Planet palette property changes, so
it can submit a new palette texture to the renderer. I added a
very simple class K14Timestamps which stores the timestamps at
which a named property is either read or written and flags them
as ‘dirty’ when their write timestamp is ahead of the read
timestamp. Using Key-Value Observing, clients can register
a K14Timestamps insntance to receive callbacks whenever
a named property changes, to automatically update the write timestamp
stored for the property. To be able to synchronize the K14Timestamps
class with the elapsed game time, the elapsed and elapsedTicks
properties of the K14Game class have been moved into a new class
K14Clock, which is passed on construction of a K14Timestamps
instance to access the current game time when a property is read
or written.
Video
I made a video that shows the palette rendering in action. I added an
optional palette index to the K14Sprite class, which entities can
set from their Lua class to switch palettes. In the video, you can
see palette swapping in action:
Next steps
Still on my list are particle effects, so that’s what I will be working on next.
Development scoreboard
All of this was pretty straightforward to implement, estimated development effort was about 4 hours for a total of ~284 hours. Native code SLOC count increased by 114 to 7685 lines in total. Lua SLOC count increased by 2 because a palette index field was added when creating the sprite dictionary for some entities, and is now at 673 lines.